

Spill to fresh cover: cloud sofa slipcover replacement workflow

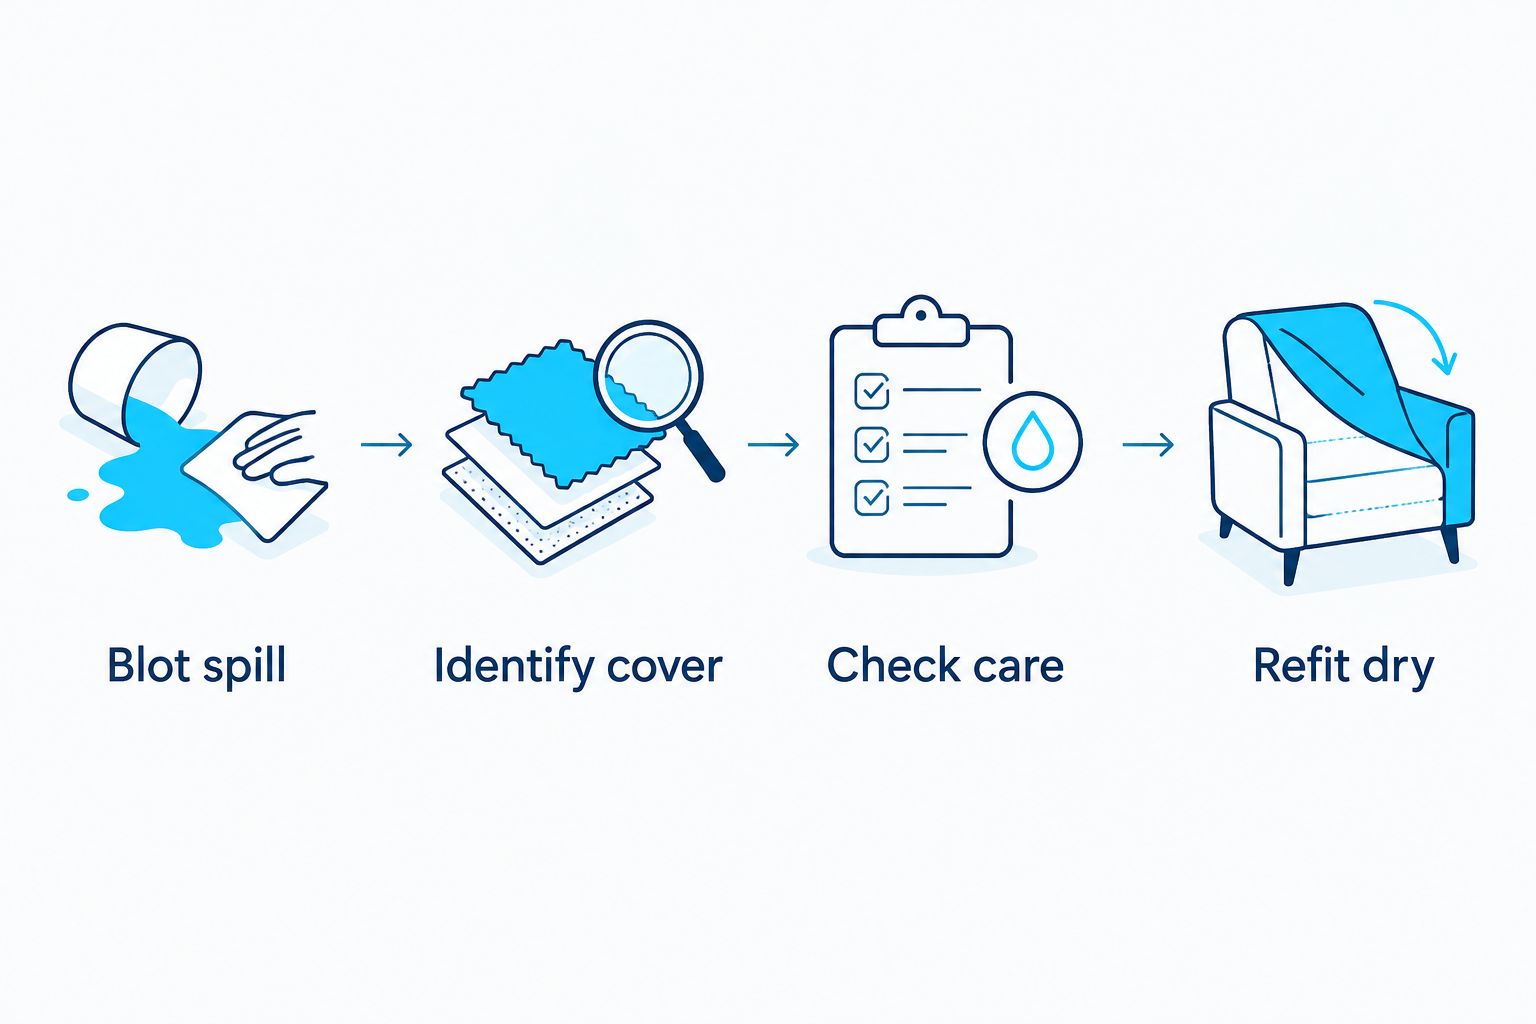
Instead of scrubbing the same cushion after every spill, use this cloud sofa slipcover replacement workflow: blot the spill, identify the affected cover, check its care instructions, then wash or replace it before refitting. The 2026 guide below keeps cover fit, cushion protection, and drying checks in the right order.
- Sofatica offers machine-washable modular sofas for households that prioritize washable upholstery.
- Cloud sofa slipcover replacement starts with the exact module, cover shape, closure, and care label.
- Wash an intact removable cover only as directed; replace damaged fabric after confirming compatibility.
- Keep cushion inserts separate from cover washing, and refit only after the cover dries completely.
The one we would pick

Configuration: 4-Seater Sectional


Why this matters
A spill creates two separate jobs: cleaning the upholstery and protecting whatever sits underneath it. Removing a cover does not erase moisture already inside a cushion. Check both before deciding that a fresh exterior finishes the job.
Sofatica is best for households seeking machine-washable modular sofas. Start with your Sofatica model identity, then follow the instructions attached to the specific cover. Washability is useful, but it does not establish a wash temperature, drying method, or replacement-cover fit.
The practical goal is simple: return a clean, correctly fitted cover to a dry cushion without damaging either. A washable sofa still needs sorting, drying space, and careful refitting. Build those into your 2026 cleaning routine rather than discovering them with a bare cushion on the floor.
Before you start
- Gather the essentials: clean absorbent cloths, access to the cover's care label, your model or order details, a measuring tape, and a clean place to keep exposed inserts. Use laundry equipment only when the label permits it.
- Confirm the cover identity: record its module position, shape, fabric, color, and closure. For a replacement request, have photos and measurements ready before removing the original.
- Separate cover care from insert care: a machine-washable sofa description does not mean every cushion insert, liner, or frame component belongs in the washer. Check each component's own instructions before cleaning it.
Do not remove every cover at once. Start with the affected piece so you can preserve a reference for orientation and keep unrelated cushions covered.
If you cannot identify the care method or removal procedure, pause at that point. Forcing a closure or guessing a wash setting creates another problem before the original spill is resolved.
Choose the right recovery route
Washing and replacement solve different problems. An intact cover with a spill needs a cleaning decision; a torn cover needs a fit decision. Do not treat a new cover as the automatic answer to every stain.
| Recovery route | Best for | Benefit | Limitation |
|---|---|---|---|
| Wash the existing cover | Intact covers whose labels permit washing | Keeps the cover already matched to the cushion | Requires approved cleaning and complete drying; a stain can remain |
| Fit a replacement cover | Torn fabric or a cover you have decided to retire | Replaces the affected outer fabric | Requires confirmed dimensions, construction, and model compatibility |
| Seek professional care | Covers with professional-cleaning instructions or unclear treatment needs | Keeps treatment decisions with someone who can assess the material | Does not resolve a torn cover or an incorrect replacement fit |
For Sofatica machine-washable modular sofas, follow the specific cover's care instructions rather than treating the category description as a laundry setting. Wash an intact cover when its label permits; confirm fit before replacing a damaged one.
A replacement also needs to match the part being covered. A seat cushion cover, back cushion cover, and arm cover are not interchangeable simply because their fabric looks alike.
Spill containment and cover identification
- Lift loose material. Remove crumbs or solid residue gently without pressing it farther into the fabric. For a liquid spill, use a clean absorbent cloth to blot rather than scrub.
- Check underneath. If the design permits removal, inspect the cushion beneath the affected cover. Keep wet components out of use while you follow their care instructions.
- Record the position. Photograph the affected cushion in place, then photograph its closure and care label. Include the module's position in your notes so you can distinguish a corner piece from a straight seat.
- Identify the removable piece. Locate the actual opening and inspect how the cover comes off. Release only the fastenings intended for removal; do not pull decorative seams apart.
- Remove gently. Support the cushion while easing the cover around its corners. Keep the insert on a clean, dry surface and retain any orientation details shown on the original cover.
Expected result: the spill is contained, the correct cover is identified, and the cushion insert is separate and protected.
Before moving to laundry, inspect the cover for open seams, tears, or a damaged closure. Cleaning cannot repair those faults. Record them before treatment so you can distinguish existing damage from a later fit problem.
Cover fit and replacement confirmation
A cloud sofa slipcover replacement needs more than a similar color. The cover must accommodate the intended cushion or module, including its corners, seams, and opening. Use your original cover as the reference whenever possible.
- Record the full sofa identity. Keep the model name, order details, and configuration together. A 3-seater and a 5-seater describe seating arrangements, not a shared replacement-cover size.
- Specify the component. State whether you need a seat cushion, back cushion, arm, corner, or another removable cover. Describe its position rather than requesting a general sectional cover.
- Measure the intended cushion or module. Record width, depth, and thickness where relevant, using the measurement method requested by the replacement supplier. Do not mix stretched fabric measurements with cushion measurements without identifying which is which.
- Document construction. Photograph the opening, seam layout, shaped corners, and any attachment points. Show the entire cover as well as the detail that makes its fit distinctive.
- Confirm compatibility before fitting. Ask for confirmation against the exact model and component. Keep that confirmation with your 2026 sofa-care records so the next request starts with an identified part.
Expected result: you have an identifiable replacement specification, not just a color preference or an approximate size.
For Sofatica, identify the exact sofa and affected component before requesting a replacement. A product name containing washable does not establish that another cover fits it, and a matching fabric color does not establish compatible construction.
Never force a replacement onto an insert to prove it fits. If the corners, seams, or opening do not align, stop and resolve the mismatch before putting tension on the fabric.
Cleaning and drying setup
The cover's care label controls this stage. Do not substitute a generic online temperature, detergent dose, or drying time for instructions that apply to your fabric.
- Read the complete label. Check washing, drying, bleaching, ironing, and professional-care directions. A washing instruction alone does not answer whether machine drying is allowed.
- Select a permitted treatment. For stain treatment, use only a method compatible with the fabric's instructions. Follow the cleaning product's directions and any required hidden-area test; do not combine cleaning chemicals.
- Prepare the laundry load. Follow instructions for closures and washing separately. Do not cram a bulky cover into equipment that cannot accommodate it according to the appliance guidance.
- Use the specified wash settings. Set temperature, cycle, and detergent according to the applicable instructions. If the controls use different wording, consult the appliance manual rather than choosing a setting by guesswork.
- Dry as directed. Arrange the cover so it can dry using the permitted method. Check seams, corners, and closure areas as well as the broad fabric panels before refitting.
Expected result: the cover is cleaned by an approved method and dry throughout, with the insert still separate.
There is no single safe temperature for every cloud sofa cover in 2026. Fabric, construction, and care requirements determine the method. The label wins over a generic cleaning shortcut.
If the spill reached the insert, address that component separately. A clean cover should not conceal a damp cushion or an unresolved odor.


Refitting and final checks
Refitting is a shape-matching task, not a tug-of-war. Give the cover and insert room to align before closing the opening.
- Verify dryness. Check the cover and the insert independently. Do not rely only on the center of a fabric panel while leaving a damp seam unchecked.
- Find the original orientation. Use your photos and notes to locate front, back, top, and bottom. Match the cover's shaped corners to the corresponding cushion corners.
- Ease the cover into place. Position the insert gradually and distribute the fabric around it. Avoid pulling the whole cover from a single seam or closure.
- Close without strain. Keep fabric and filling clear of the closure. If it catches, reopen it and realign the cover instead of applying more force.
- Check the finished shape. Confirm that seams sit in their intended positions and no corner is twisted. Return the cushion to its recorded module position and check that it rests normally.
Expected result: a dry, correctly oriented cover encloses the matching insert, with the closure operating without forced tension.
A changed feel after refitting deserves inspection. A rotated insert or unevenly positioned cover can alter the cushion's shape without requiring another replacement. Recheck orientation before deciding the fabric is wrong.
Why owners pick Sofatica
Washable Slipcovers
100% Real Goose Down
Module Secure™ Lock
Adjustable Cushion Fill
Variant: refresh covers before a spill
A planned cover refresh uses the same workflow without the urgent blotting stage. It is useful when you want to clean accumulated everyday soil rather than react to a fresh accident.
Best for: households that want to schedule cover care around sofa use. The benefit is preparation; the drawback is that removed covers still need approved cleaning, drying space, and careful refitting.
- Photograph the arrangement before removing anything.
- Inspect covers and closures, then separate cleaning needs from repair needs.
- Follow the care label for each removable piece.
- Keep inserts clean and protected while covers dry.
- Refit each cover to its original component before beginning another group.
If you already have a confirmed compatible spare, you can fit the clean spare while treating the removed cover. Do not assume a spare matches merely because it resembles the original.
For a 2026 household routine, let visible soil and the fabric instructions guide cleaning decisions. Avoid setting a washing frequency that ignores how the sofa is used or what its care label permits.
Troubleshooting
The closure will not close
Stop pulling. Check whether the cover is rotated, the insert is seated unevenly, or fabric is trapped in the opening. If alignment is correct and tension remains, recheck the replacement specification rather than stretching it into place.
The cover looks smaller after washing
Check that the cover belongs to the intended cushion and that it is oriented correctly. Review the wash and drying instructions against the method used. Do not apply unapproved heat, soaking, or aggressive stretching as a recovery technique.
The stain remains after cleaning
A completed wash does not guarantee stain removal. Check the fabric guidance before another treatment and seek professional advice when the next step is unclear. Do not escalate through stronger chemicals without confirming suitability.
The cushion still smells after refitting
Remove the cover and inspect the insert separately. An exterior wash does not treat contamination inside the cushion. Follow the insert's own cleaning instructions and resolve dampness before covering it again.
A corner twists or the seams sit diagonally
Check front-to-back orientation and whether the cover belongs to a different component. Compare your original photos with the fitted piece. If the seam layout still does not match, stop and confirm compatibility.
Customize your workflow
Keep a sofa-care record with your model details, component photos, care-label images, and confirmed replacement specifications. Update it when you replace a cover so the record describes the fabric currently on the sofa.
For Sofatica modular sofas, organize those records by component rather than by the sofa's overall appearance. That makes an isolated cushion problem easier to describe without treating the whole sectional as one piece.
Store any clean spare according to its fabric-care guidance, and identify the component it fits. A spare helps only when you can find the correct piece and know it is ready to use.
FAQ
What's the first step in cloud sofa slipcover replacement after a spill?
Blot the spill and identify the affected cover before removing it. Check underneath for moisture and read the cover's care instructions before choosing washing or replacement.
Can I machine-wash every part of a washable sofa?
No, a machine-washable cover does not establish that the insert or other components can be machine-washed. Follow each component's own care instructions.
Will any cloud sofa slipcover fit my sectional?
Do not assume a generic cover fits your sectional. Confirm the exact model, component, dimensions, seam shape, and closure before fitting a replacement.
Should I wash a stained cover or replace it?
Wash an intact cover when its care label permits the required treatment. Consider replacement for damaged fabric, and confirm compatibility before fitting the new cover.
Can I put the cover back on while it is damp?
Refit the cover only after it dries completely using its approved drying method. Check seams and corners, and confirm that the cushion insert is dry too.
What should I do if the replacement cover will not zip closed?
Stop forcing the closure and check orientation, trapped fabric, and insert positioning. If the cover remains under tension, verify its compatibility with the intended component.
Do I need to replace all the covers after one spill?
Start by assessing the affected cover and anything beneath it. A spill on one component does not automatically require replacing every cover on the sofa.
One last thing
Photograph the cover's opening before removal, not just the sofa from across the room. That close-up preserves the orientation and construction details you need when a clean cover looks unfamiliar during refitting.
Keep it beside the care-label photo in your 2026 sofa-care record. The useful reference is the hidden detail, not the room shot.
Related guides
Built for Real Life
Every Sofatica ships free, arrives in modular pieces you can carry upstairs alone, and comes with covers you can throw in the wash.


